The first step in putting together an open source suite of GIS software is to install some sort of storage medium for your spatial data. There are many options out there, ranging from the ESRI personal geodatabase, which uses a Microsoft Access database, to a fully relational database management system like PostGreSQL with PostGIS. Each post in this series will look at one of these database types. I will discuss basic installation, and then customization like changing the location of the database files, and installation of spatial functionality.
The first database in the series is MySQL. I am starting with this database because it is arguably the most commonly installed database on most web hosting services. It is an integral part of the LAMP (Linux, Apache, MySQL, Python/PHP) open source web-hosting application stack. As with any database, there are pros and cons, some of which I will mention at the end of the post.
Now, on to the installation. This will be focused mostly on a Windows 7 installation, though some options will be applicable to other platforms.
- Download the appropriate installation package: MySQL Downloads
, The free version is the Community Server, and 5.5 is the current version. - Start the installer program.
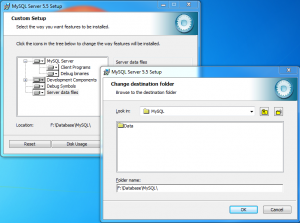
- Choose the installation type: Typical, Custom, or Complete. I usually choose the custom or complete in the cases of GIS and professional software because I do not want to have to go back and find some part of the software that is left off in the typical install, that I end up needing later. Besides, though it takes more space, wherever you install the database, whether a server or personal computer, needs to have adequate storage space anyway. In this case, I am choosing the custom install because I want to modify the standard database locations.
- Specify the path for database storage.
- That completes the setup options. Now, start the installation.
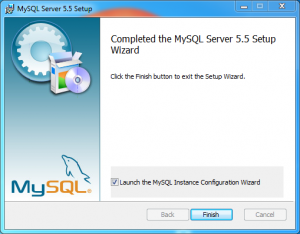
- When the installation is finished, make sure that the box is checked to run the MySQL Instance Configuration Wizard. This will set parameters to tune the database depending on your use case.
- Continue to configure the MySQL Server Instance.
- Set the configuration type. I chose the “Detailed” configuration as I want to specify at least one parameter.
- Set the server type: Developer Machine; Server Machine; or Dedicated MySQL Server Machine. I chose the Developer Machine in this case as the install is on a home computer with many other applications. If you are installing this on a server, or on a dedicated machine, then obviously, the other options would be applicable. The option chosen here affects settings related to cpu usage, and memory allocation.
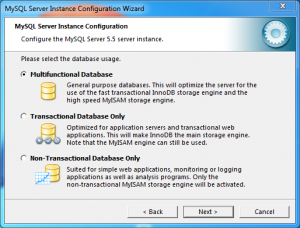
- Specify the database usage: Multifunctional database; Transactional Database only; Non-Transactional database only. I chose Multifunctional database as this takes into account all different types of transactions you may have on the database. This setting to relates to the Database engine that is set to primary for the database. The two engines are InnoDB and MyISAM. Prior to version 5.5, the MyISAM engine was standard, and this was the only one that supported the spatial data types. This engine had no failure protection however, and thus would not ensure data integrity. The InnoDB engine supports ACID transactions, and has now been made the standard engine. As well, it now supports all the spatial data types. This is testing the limits of my knowledge, but as I understand it, the InnoDB engine works more like the PostgreSQL database engine.
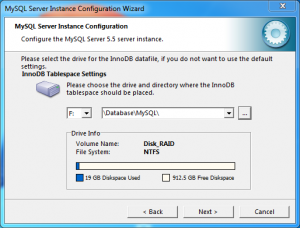
- Configure the InnoDB Tablespace location. These are indexing files created by the InnoDB engine. They should be located in the same directory as the databases.
- The last configuration screen covers whether to set up MySQL as a Windows Service, and whether to start it automatically. It also gives you the option to automatically add the “bin” path to the Windows Path environment variable. This will allow you to run MySQL directly from the command line.
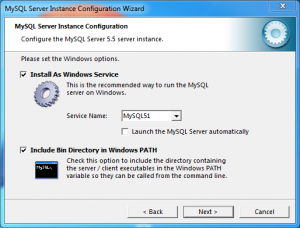
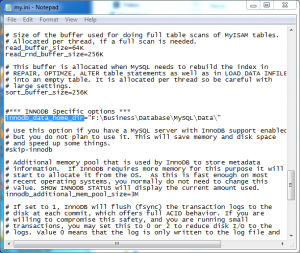
Configure MS Windows specific options That completes the installation. Unlike some of the other database packages out there, no configuration is required to enable to spatial data types. Many or most of the options that were set through the wizards above, may also be specified in the “my.ini” file, located in the MySQL installation directory. A couple of the easiest ones are shown below, in case you were to run the typical or complete installs, which don’t allow for configuration. These are the options for setting the directory for database storage, and the directory for the InnoDB tables.
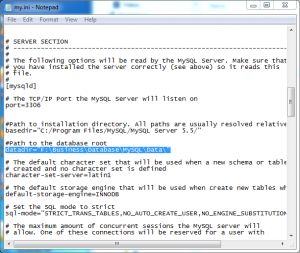
MySQL ini file - Set database directory
Hopefully this gives you a clear path for installing MySQL on your workstation or even on a basic server. There are obviously security considerations for installing on a server that are out of my expertise. There is a lot of talk on the interwebs regarding the stability and standards-compliance of MySQL compared with Postgresql and other RDBMS. I am not going to dive into that argument except to say that until more web hosting options begin to include Postgresql as an installable database option, then people will be forced to use MySQL to host spatial data that they want to use as part of a web application. I think it is possible the data stability is changing with the switch to the InnoDB engine as standard. Since this engine supports ACID compliance, which provides transactional redundancy and recovery options, it would seem the developers are at least making an attempt to address those concerns.
That is all for now. The next post in this series will cover installation and configuration of PostgreSQL. I will also be putting up some posts covering importing data into the different spatial databases, using a variety of tools.
This is a really awesome post.